When you saw a dress, did you ever think, "I wish I could make something like that"? Designing your dress pattern may not seem easy, but it is very easy. Once you understand the basics, you can create outfits that express your style and fit you perfectly.
In this blog, I will walk you through the entire process of developing your dress pattern. You will find out how easy and enjoyable it can be, from taking measurements to selecting your design and making the pattern. By the conclusion, you will be prepared to begin creating your dresses.
If you have ever wanted to create your garments, this is the place to start. Let's go.
1. Understanding Dress Patterns

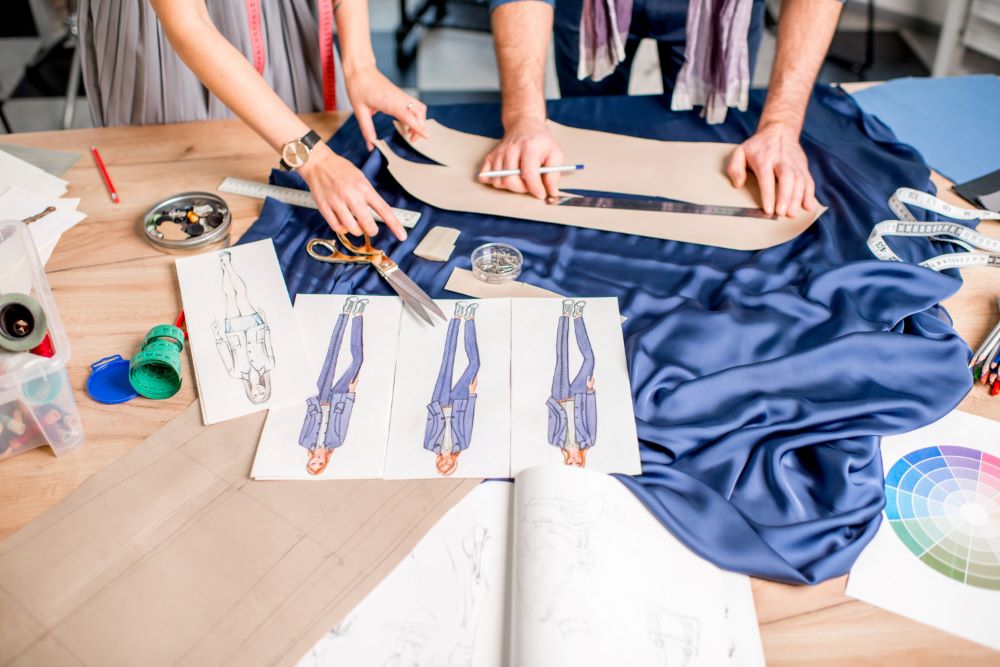
It is essential to understand what a dress pattern is and why it's useful before you begin creating your own. A dress pattern is a blueprint demonstrating how to turn fabric into a finished dress. It makes sewing easier and more accurate by helping you with measurements, shape and structure.
Here's a simpler version of the different types of dress patterns:
|
Dress Type |
What it Looks Like |
|
A-line dress |
Flows out from the waist, creating a flattering shape. |
|
Sheath dress |
Fits close to the body, giving a sleek and modern look. |
|
Empire waist dress |
It has a high waist just below the bust, giving it an elegant look. |
|
Shift dress |
A simple, straight-cut dress that’s easy and comfortable to wear. |
2. Essential Tools for Designing Dress Patterns

The right tools make the process smooth and accurate when designing your dress pattern. Here is a list of some important tools you will need:
|
Tool |
What It Does |
|
Pattern Paper |
Paper used to draw your patterns should be smooth and strong. |
|
Pattern Cardboard for Blocks |
Cardboard is used to create basic pattern shapes that can be reused. |
|
Pattern Notcher |
Mark essential spots on your pattern to guide you where to sew pieces together. |
|
Paper Scissors |
Sharp scissors for cutting pattern paper neatly. |
|
Measuring Tape |
Tape is used to measure your body and the pattern pieces. |
|
Set Square |
A tool to draw straight right angles for accurate patterns. |
|
Half-Scale Ruler |
A small ruler is used to draw details or work on smaller parts of the pattern. |
|
Grading Ruler |
A ruler is used to adjust patterns for different body sizes. |
With these tools, you will be ready to draft your patterns precisely and efficiently. The right materials will help you design dresses that fit beautifully and look professional.
3. Step-by-Step Process of Designing a Dress Pattern

Designing your dress pattern might sound complicated, but it is easy to follow when you break it down into steps. Here are some easy steps to help you design your dress pattern:
Step 1: Taking Accurate Measurements
The first step is to take the correct measurements. These are important because they help create a dress that fits well. You will need these measurements:
-
Bust: Measure around the fullest part of your chest.
-
Waist: Measure around your natural waist, usually just above your belly button.
-
Hip: Measure around the fullest part of your hips.
- Length: Measure from the top of your neck to where you want the dress to end.
Make sure your measurements are accurate for the best fit.
Step 2: Choosing the Style
Next, think about what kind of dress you want to make. Do you want something loose and flowy like an A-line or a fitted look like a sheath dress? Decide on the overall shape, neckline, sleeves and other details. This will help you know what kind of pattern you need to create.
Step 3: Creating the Basic Block
In this step, we are going to talk about basic blocks, which are the starting point for creating any dress pattern. It is a simple shape that matches your measurements. This includes the bodice (top part) and the skirt (bottom part). Draw these shapes on your pattern paper and adjust them to fit your measurements.
Step 4: Adding Design Details
Now, it is time to get creative. You can add:
-
Darts: These help shape the dress to fit your body.
-
Seams: Decide where the dress will have seams, such as along the sides or front.
-
Sleeves and Neckline: You can change the sleeve style and make the neckline deeper or add a collar.
- Pleats or Gathering: Add pleats for extra detail or gather fabric for volume.
Make sure to mark everything clearly on your pattern.
Step 5: Drafting the Pattern
Once you have decided on your design details, draw out the individual pieces of your dress pattern. These include the front and back pieces, sleeves and other parts. Be sure to include all the changes you made, such as darts or seams and mark important lines like the grainline, notches and seam allowances.
Double-check your measurements to make sure everything fits.
Step 6: Adding Seam Allowances
Seam allowances are extra space around your pattern pieces. You sew fabric together in this area. Add about 1/4 to 1/2 inch around the edges of all your pattern pieces before cutting out the fabric.
4. Tips for Designing Perfect Dress Patterns

Designing your dress pattern can be fun, but a few things can help make the process easier. Here are some simple tips to help you create the best dress patterns:
-
Start Simple: If this is your first time designing a pattern, begin with something simple. An essential A-line or shift dress is a great place to start. As you get more comfortable, you can try more complex designs.
-
Accurate Measurements Matter: The fit of your dress depends on how well you measure yourself. Take your time and measure carefully to avoid any fit problems later on.
-
Use a Muslin for Fitting: Make a test version of your dress using cheap fabric like muslin before cutting it into your final fabric. This helps you check the fit and make changes if needed. Fixing mistakes on a muslin is much easier than on your final fabric.
-
Add Ease for Comfort: Leave extra room in the pattern if you want your dress to feel comfortable. This will ensure the dress is not too tight, especially around your bust or waist.
-
Adjust for Your Body Shape: Everyone's body is different. If the pattern does not fit perfectly, feel free to make adjustments. For example, add extra room for a larger bust or waist.
-
Keep Track of Changes: Write down any changes you make as you work on your pattern. This will help you remember what worked and what didn't and help you improve in the future.
-
Practice Makes Perfect: The more you practice, the better your patterns will get. Do not worry about making mistakes; they are a normal learning process. Each pattern you make will teach you something new.
5. How to Read and Use Pre-made Dress Patterns

Pre-made dress patterns are a great option if you don't want to design a pattern from scratch. They make creating a dress easier by giving you all the necessary steps and pieces. Here is how to use them:
1. Understand the Pattern Envelope
The pattern envelope has all the key information you need. It includes:
-
Size chart: Compare your measurements to the size chart on the envelope to choose the right size.
-
Fabric suggestions: This tells you what fabric works best for the pattern. Be sure to pick a fabric that matches these suggestions.
-
Difficulty level: Patterns are labelled by skill level, from beginner to advanced. If you are new to sewing, start with a beginner pattern.
2. Read the Pattern Instructions
The pattern includes step-by-step instructions for making the dress. Read through the instructions before you start so you know what to expect.
3. Make Adjustments
You can still make changes even though you are using a pre-made pattern. Want a different neckline or sleeves? Feel free to make small changes to the pattern to suit your style.
4. Sew and Check the Fit
Once you have sewn the pieces together, try the dress on to ensure it fits. Make adjustments like taking in the seams or adding more length before finishing the dress.
Using pre-made patterns is an easy way to start making your dresses. Once you feel good with them, you can add your style. You can even try making your own patterns.
6. Advanced Techniques for Experienced Designers:

|
Technique |
What It Is |
|
1. Draping |
I worked with fabric on a dress form to shape the dress and then turned it into a pattern. |
|
2. Multi-piece Patterns |
Using different pieces to create a dress, like pleats or unique sleeves. |
|
3. Pattern Grading |
Adjusting a pattern to make it fit different sizes. |
Also Read: A guide on how to design your dress
Conclusion
Designing your dress pattern is a fun and exciting way to express your style. Whether you are just starting or ready to try more advanced techniques, making your patterns lets you create one-of-a-kind clothes.
So, don't be afraid to try new things, make mistakes and enjoy the process. Whenever you create a new pattern, you will learn something new and get closer to designing the perfect dress. Happy sewing.
We also happen to be a magnet for suggestions, and would love to catch yours….throw us yours on hello@fabriclore.com


